Thursday, April 29, 2010

Fake-out Baked Potato Soup

Baked potato soup you get in a restaurant may be creamy and decadent, but what you may not realize is just how loaded with fat and calories it is. Our take on it is lower in fat yet just as satisfying. In no time at all, you'll have made a thick and creamy bowl of hearty potato soup.

1. Wrap 3 medium potatoes in a damp paper towel and microwave for 5 minutes or until mostly cooked through. Allow to slightly cool so they can be handled with hands.

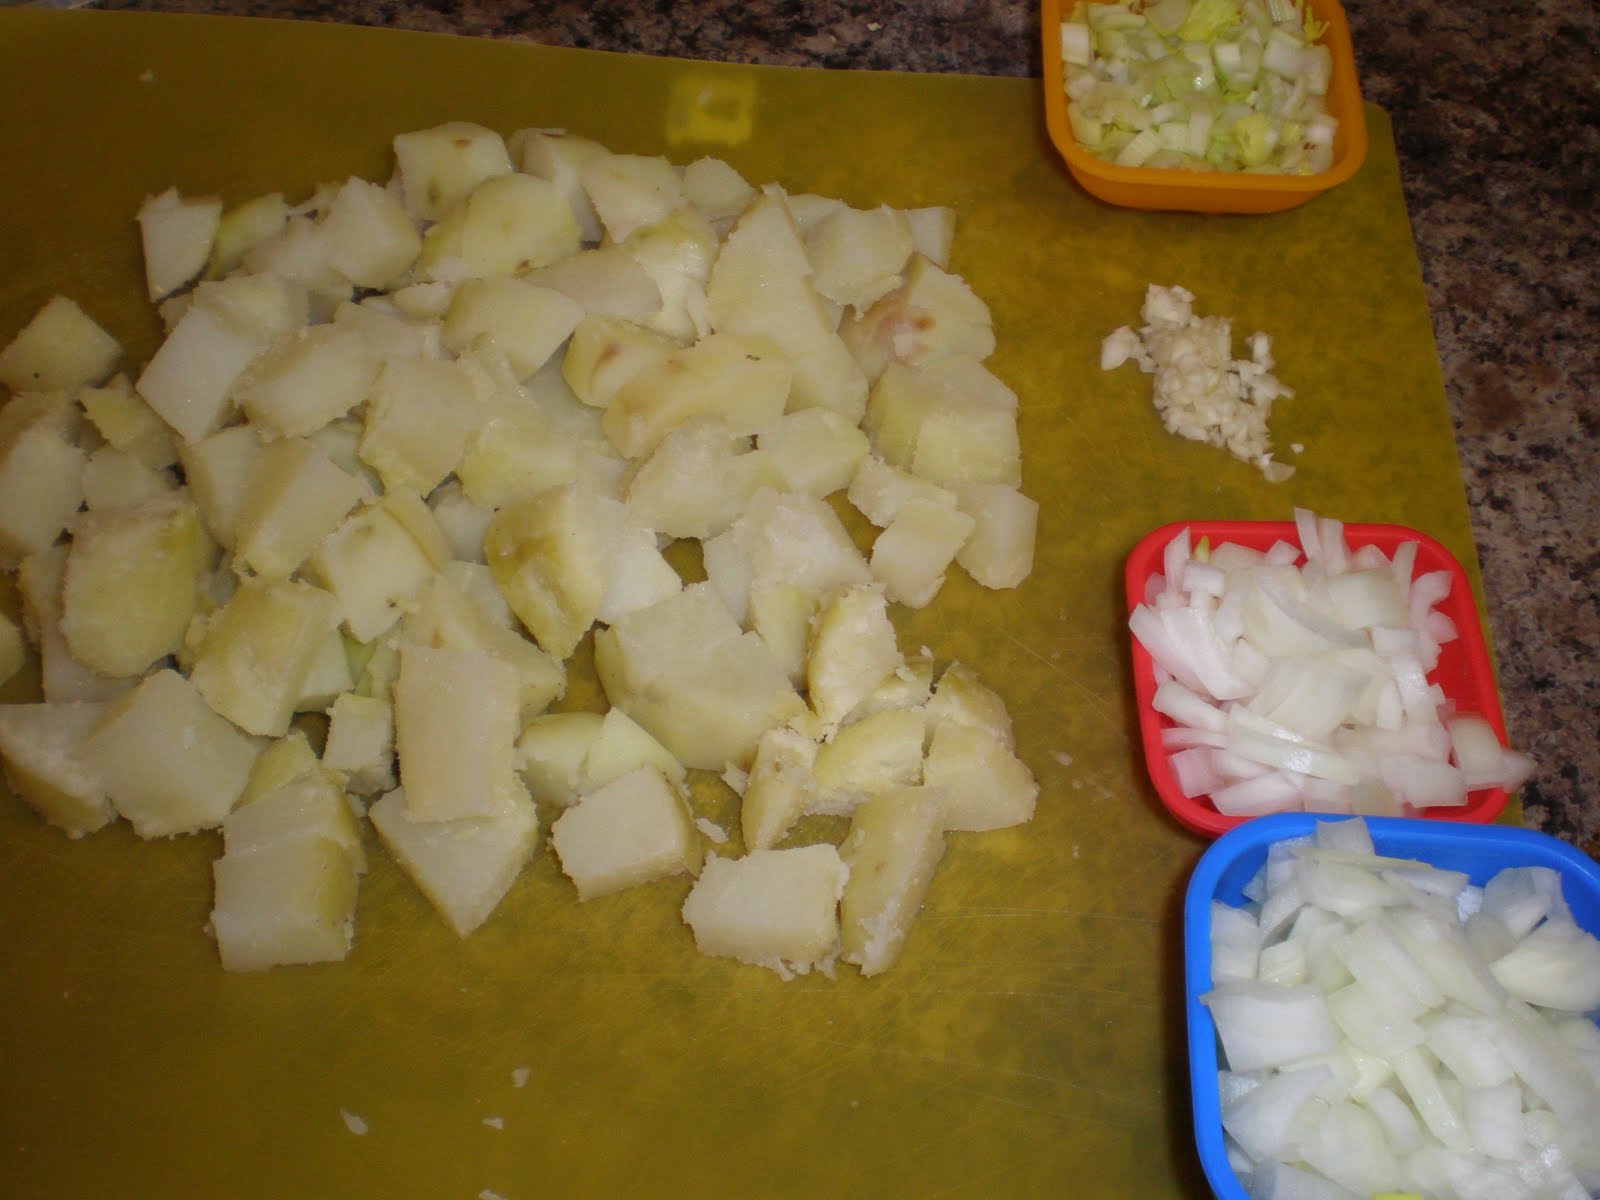
2. Meanwhile, finely chop 1/3 cup celery, 3/4 cup onion and 1 clove garlic.

3. Peel skins off of potatoes with a vegetable peeler once potatoes are slightly cooled. Chop peeled potatoes into chunks.


4. Heat 1 tablespoon olive oil (or butter) over medium heat in a heavy saucepan. Once oil is hot (it will ripple), add celery and onions to pan and sauté for 4 minutes, or until onion is translucent and tender. Season with salt and pepper liberally.

5. Add minced garlic to cooked onions and celery and sauté for an additional 1 minute. Don't let garlic brown or burn.

6. Sprinkle 1 tablespoon all-purpose flour over vegetables. Stir to coat and until flour is well mixed in with the vegetables.

7. Add 2 cups of vegetable or chicken stock. Stir. Cover and continue cooking, stirring occasionally until mixture thickens, about 5 to 7 minutes.

8. Once mixture thickens slightly, add potatoes and 1 cup grated white (or yellow) cheddar cheese. Stir, smashing potatoes with a potato smasher and letting cheese melt.


9. If mixture is too thick, you can add milk, cream or more stock until it's to desired consistency. Also, for a thinner, smoother soup, you can puree mixture in a blender in batches.

10. Stir in 1/2 cup sour cream. Salt and pepper to taste. Optional: add about 10 to 15 drops of hot sauce for a hint of spice.

11. Garnish soup with more grated cheese, crumbled bacon, chives or green onion. Enjoy this fake-out baked potato soup for less calories, but same great flavor!


Sunday, April 25, 2010

Tortilla Chips

Never buy a bag of fried tortilla chips again! This delicious and simple snack is perfect for your next get-together or just for munching on during the day. If you have time to buy a bag of greasy fried chips, you have time to, and should, make this healthier version of the much-loved snack food.

1. Preheat oven to 410 degrees Fahrenheit.

2. With a sharp knife, cut each flour tortilla into eight triangles. (We used whole wheat to make it even healthier and to add a boost of fiber.)

3. Place tortilla triangles in a single layer on a large baking sheet.

4. Drizzle with 1 tablespoon vegetable oil and sprinkle with salt and pepper to taste.

5. Toss chips in oil and seasonings with your hands until evenly coated. Spread tortillas back into a single layer.


6. Place tortillas in preheated oven and bake on each side for approximately 3-5 minutes, or until golden brown and crisp.


7. Remove from oven and serve with either queso dip or hummus. Enjoy this healthy, simple snack!

Saturday, April 24, 2010

Skillet Hash Brown Potatoes

For breakfast, lunch or dinner, these skillet potatoes are delicious and fool-proof. It's so easy to make this side dish, you will find yourself cooking it any chance you get. Emily and I make these as smaller hash brown potatoes almost every Saturday morning and as larger fried potatoes at least one weeknight a week.

1. Heat a large skillet over medium heat. Cover the bottom of the pan with about 2 tablespoons olive oil.

2. Slice 1 medium potato (for 2 people) in 1/2 inch chunks. You can slice them larger if you want a heartier side dish.


3. Place sliced potatoes in the pan when the oil is rippling.

4. Cover the potatoes with the oil and put the lid on the pan. Let sit for about 5 minutes, or until potatoes are almost cooked through.


5. Remove the lid and stir potatoes. Season liberally with salt and pepper.

6. Lower the heat of the stove to medium. Let potatoes continue cooking for 5 more minutes, stirring occasionally so they brown on the outside.


7. They are finished when they are crisp on the outside and tender on the inside. Sprinkle lightly with more salt, and dried or fresh herbs, if desired, to finish. Enjoy this simple dish for breakfast, brunch, lunch or dinner!


Tuesday, April 13, 2010

Easy Lemon Pie

Don't have time to make dessert, but want a sweet ending to a meal? This refreshing and tangy lemon pie is the perfect easy addition to weeknight meals, date nights or as just an afternoon snack. This dessert is easy enough to always have one waiting in the fridge!

1. For the graham cracker crust, crush about 20 graham cracker squares in a food processor or in a plastic storage bag.

2. Melt 1/2 cup of butter. Mix the crushed graham crackers, melted butter and 2 tablespoons sugar.

3. Evenly press mixture into the bottom and up the sides of a 9-inch round pie pan. Make sure there are no holes in the crust so the lemon mixture doesn't seep through.

4. If possible, refrigerate crust for an hour to set.

5. After crust has set, blend 1 (12 oz.) can of thawed frozen lemonade, 1 (8 oz.) tub of whipped topping and 1 (14 oz.) can of sweetened condensed milk in a large bowl with a hand mixer.

6. Once well blended, spoon mixture into crust and spread evenly.

7. Cover and refrigerate pie for a minimum of 2 hours to let filling set. Enjoy this tart, yet sweet, easy lemon pie!

Simple Homemade Thin-Crust Pizza

This pizza is perfect for a quick weeknight dinner for any group of people. For the crust, you can either buy a ball of dough from a pizza parlor or, if you have an hour of free time, you can do as we did and make your own.

For the dough: mix 1/2 cup warm water with 2 teaspoons dry active yeast in a small bowl. Let the mixture stand until the yeast dissolves, about 5 minutes. Mix 2 cups all-purpose flour and 1 teaspoon in a food processor. Blend in 3 tablespoons olive oil. With the machine running, add the yeast mixture and blend just until the dough forms. Turn the dough out onto a lightly floured surface and knead until smooth, about 1 minute. Transfer the dough to a large bowl that has been brushed with olive oil, and turn the dough to coat with the oil. Cover the bowl with plastic wrap and set aside in a warm draft-free area until the dough doubles in volume, about 1 hour. After an hour, punch down the dough and form it into a ball. The dough can be used immediately or stored airtight in the refrigerator for 1 day.

1. Preheat the oven to 450 degrees Fahrenheit.

2. Roll out the dough onto a 13x8-inch rectangular baking sheet. If the dough is not stretchy enough to roll with a rolling pin, you can press it out with your fingers. Stretch the dough thin, covering the entire baking sheet.

3. Once you are finished rolling out the dough, use a fork to make small holes to help air escape, so that air bubbles don't form.

4. Brush about 1 tablespoon of olive oil onto the crust with a marinating brush.

5. Spoon pre-made tomato sauce (we used DelAllo brand) onto crust and spread evenly.

6. Sprinkle tomato sauce with about 1 teaspoon of dried basil, 2 cloves of fresh, finely chopped garlic, 1/2 teaspoon kosher salt and 1/4 teaspoon black pepper. (For a spicy kick, also sprinkle with a pinch of red pepper flakes.)

7. Top sauce with slices of fresh mozzarella cheese, grated Parmigiano Reggiano and any other toppings you prefer. We covered half of the pizza with slices of onion and yellow pepper.

8. Cook pizza at 450 degrees Fahrenheit for 15 minutes, or when cheese is brown and bubbly. Let pizza cool for a couple of minutes before slicing and serving. Enjoy!